
Conquerors Atlas Guide for 3.11
Changelog
v1.1 – 24th August 2020
- Several grammatical updates for clarity
- Notes regarding favourites and removing Watchstones to force drops
Overview
In the Conquerors of the Atlas expansion, the way that the Atlas works was completely redone. In particular, Conqueror’s influence and Watchstones were added. This has caused a lot of confusion, and I still haven’t seen anyone else create a good guide yet. So in the absence of a full explanation by the one-and-only Karv, I’ll do my very best to explain everything you need to know about how to progress through the current Atlas.
Aside
When considering your league start build, it is very important for your Atlas progression that you KNOW your build is a powerful build that will be able to run the first 16 Conquerors on a 4-link, and will be able to fight everything after that on a 5-link. You may well have a 6-link by that point, but the build should still function well even if you end up stuck using a 5-link.
While I fully support special “I made this myself” meme builds, and encourage them in general, league start is not the time for this. Instead, pick an up-to-date build that you know is powerful enough to complete your Atlas, and do so as swiftly as you can.
Map Drop Rules
There are some basic rules that maps must follow when dropping as loot from regular content, and a separate set of rules for dropping as loot from league-specific “reward content” (such as Blight, Delirium, Incursion, Delve, the Labyrinth, and more, as well as future league mechanics). The rules for map drops from reward content are different, are will not be mentioned in this guide – we will just focus on map drops from regular monsters. The regular map drop rules are as follows:
White (Normal) monsters can only drop maps of up to the same level as the area you are in.

+0
Blue (Magic) and Yellow (Rare) monsters may drop maps up to one level higher than the area.

+1
Orange (Unique) monsters may drop maps up to two levels higher than the area.

+2
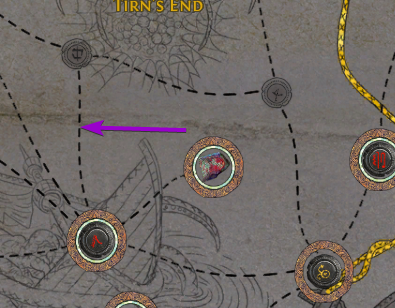
The only maps that are allowed to drop are maps that you have already unlocked, or maps directly connected to the map that you are running on the Atlas. You can see the dotted lines that connect maps on the Atlas. Note that tier 1 maps ignore this rule, and can drop outside of maps in the story content.
As you gain map completion bonus the tiers of maps that can drop improve. Each bonus contributes 1% towards maps being able to drop at a higher tier.
For example, if you have gained 5 bonus completion, monsters have a 5% chance to drop maps of 1 tier higher. This can not exceed the limits shown above – so white monsters will still only be able to drop maps of equivalent level to the zone.
This bonus can go over 100% and continues to stack, increasing the possible level. For example, at the maximum bonus of 154%, monsters always drop maps 1 tier higher, and have a 54% chance of dropping 2 tiers higher. Note that this also means that tier 1 maps can no longer drop from maps above tier 1, as they would be raised to a tier 2 (or tier 3) instead.
Atlas Rules

The atlas is separated into 8 regions – 4 outer regions and 4 inner regions

Each section has 5 stages, which depend on the Watchstones that are currently socketed in them

Each Conqueror kill in a particular region gives you only one Watchstone

Each time that you kill a particular Conqueror, it then requires one additional Watchstone in order to spawn it, up to the maximum of 4.
Notes
- You don’t need to focus on map completion. This used to be the case under the previous Atlas systems, and many people still cling to this as a result.
- This does not mean that we ignore completion entirely, we just won’t go out of our way to get it. When running yellow maps they should still have Alchemy orbs used on them. As should red maps when we get there. There is no time in any league where we run any maps yellow or above without them being rare.
- Your main focus should be on spawning the Conquerors and progressing the Atlas level.
- The very first priority is spawning all 8 Citadels. These are guaranteed to spawn the first time that you run a tier 3 map in each region.
Once you have unlocked Zana (by running your first tier 3 map), you should use Zana missions whenever you are low on maps, but at appropriate tiers. Specifically, all white Zana missions should be used on tier 5 maps, in the hopes that a tier 6 map will drop while running it. Yellow Zana missions can be used on tiers 6 to 9 if you are completely out of these tiers and struggling to maintain map drops, but otherwise should be used for tier 10 maps whenever possible in hopes of getting a red map from her. Similarly, red Zana missions should ideally be used for tier 15 maps whenever possible, as this is the tier from which you can get Cortex and Guardian maps. You can still use your red missions for tiers 11 to 14 if needed, however, to help you break into these tiers.
Whenever we do not have Zana missions, use Alva, Jun, and Einhar for map sustain. Niko does not do a good job of helping us map sustain, but delving is also important so we should use Niko whenever we get an exceptionally high quantity map. The goal should always be to not let these master missions build up, this is one of the most common mistakes new players make. USE YOUR MISSIONS.
Simple and Prime Sextants should be used liberally at any stage after reaching yellow tier maps, as we use Awakened Sextants pretty much exclusively once running maps with 4 socketed Watchstones. So feel free to use these lower two types whenever your map pool is starting to run low, as well as using chisels whenever your map pool is low, or for your first map trying to break into a new tier.
Stash Tab Strategy
While progressing through your atlas completion, I recommend keeping any maps that you need for progression that are of the right level separate to your other maps. In my case, I put my progression maps into a regular stash tab, while any map that was not needed for progression went into my map stash tab.
Gathering Watchstones
Collecting Watchstones 1 – 8
To begin with, we must spawn a Conqueror in any of the four outer regions (it doesn’t matter which one). This is forced by the quest state – the very first Conqueror will only be able to spawn in one of these outer regions, and no other Conqueror will spawn while the first one is active.
This only applies to the very first Conqueror that is spawned – after that initial kill, we can then spawn more than one Conqueror at a time.
When a Conqueror has spawned, it will influence that region on the Atlas. We can tell when this has happened as the influenced region will be highlighted with the Conqueror’s colour. For the purposes of this guide, we’ll call the region that the first Conqueror spawns in “Region 1”.
Once a Conqueror has been spawned, we must then complete any three maps in the influenced region before we can fight the Conqueror. After completing these three maps, the quest state will change. At this point we can go and talk to Officer Kirac, followed by Zana, in order to open a portal to the map containing the Conqueror encounter.
We now run the map that Zana has opened for us, and defeat the boss. Once we have done this, a portal will open that takes us to the Conqueror’s boss zone. We now defeat the Conqueror, claim the Watchstone that they drop as loot, and place it in the Citadel of Region 1, where we had spawned the Conqueror.
Now follow the previous steps in a new outer region to spawn and defeat the second Conqueror. We’ll call this “Region 2”.
Note that you should be running the highest tier maps that you have, as we want to drop tier 6 maps that belong to Region 1.
After defeating the second conqueror, you’ll receive another Watchstone. Don’t socket this just yet, however. From this point onwards, we want to keep a careful eye on our maps.
If you have three tier 6+ maps from Region 1, remove the Watchstone from that citadel and place it into the Citadel for Region 2.
If you haven’t yet received three tier 6+ maps, move on to the next region.
Throughout this process, managing your maps is very important. As soon as you have three maps of the area that currently has a socketed Watchstone, move the Watchstone to the next region. This will ensure that you always have maps dropping in advance to smoothly chase the Conquerors.
Follow the above steps to spawn and defeat a Conqueror in all four outer regions of the atlas. Make sure to keep a close eye on your maps and move the Watchstones when appropriate.
Once you have acquired the first 4 Watchstones, insert one of those Watchstones into the Citadel for Region 1. If you haven’t yet gotten all of the tier 6+ maps for the outer regions, leave a Watchstone socketed in those regions.
NOTE: If you already have all of the maps for the region you’re in, once you launch a map, you can remove a watchstone from the region you’re running to guarantee all of the high tier map drops are from the region you are preparing for next.
Check to see if you have three tier 6+ maps for all four outer regions. When you do, remove any Watchstones from regions you aren’t currently chasing the Conqueror in. Place 2 Watchstones into the Citadel for any one of the INNER regions. We will call that Region 5.
Make sure that you are running the correct tier of maps. Specifically, they need to be the same tier as what is shown on the Atlas when a single Watchstone is socketed. The Conqueror will spawn on the first map that you run, and will show up again on the second and third maps. Speak to Kirac and Zana once more, and kill the Conqueror.
Remove the Watchstone from Region 1 and place it into the Citadel of Region 2. Once again run three maps of the right tier in Region 2 to spawn and defeat the Conqueror.
Repeat the steps above, starting from ‘Begin the second loop in Region 1’, to obtain another full set of Watchstones from the outer regions. At this point, you should have collected a total of 8 Watchstones.
Ensure that you are always planning ahead and switching the placement of your Watchstones into inner regions as necessary.
Collecting Watchstones 9 – 20
Run 3 maps in any inner region (that we named Region 5 earlier) with 2 Watchstones socketed in that Citadel. (though it does not matter what specific inner region you start at).
Remember to move the stones around in the inner regions to continue to collect maps that are needed, instead of just random maps of higher tiers.
We want to progress into these in the same way we did the last two loops. As soon as you have collected enough maps to complete a loop around the inner regions, immediately place 3 Watchstones in the first region you completed (Region 5) and start collecting maps to kick-start the second inner loop.
Move to the next inner region (We will call Region 6) and run three maps of appropriate tiers, then defeat the Conqueror and obtain their Watchstone.
Following the above steps, spawn and defeat a Conqueror in all four inner regions of the Atlas.
Insert 3 of your stored Watchstones into the Citadel of Region 5.
Continue to keep an eye on your map stash. Make sure to move your Watchstones around once you obtain three appropriately tiered maps in the region that your spare 3 Watchstones are socketed.
Spawn and kill the Conqueror in Region 5.
Continue to loop around the inner regions, repeating the steps above to spawn and defeat a Conqueror in each. Once you have finished the loop, you should have 16 Watchstones. Now keep going with another loop around the inner regions, but this time using 4 stones to spawn and defeat each Conqueror. At the end of this loop, you should have a total of 20 Watchstones.
At this point, Sirus will spawn. Whilst he is active, Conquerors cannot spawn – so you need to launch his fight to clear him off of the Atlas. You don’t technically need to kill him at this point, but it’s good practice so you might as well try!
Collecting Watchstones 21 – 32
At this point it is fairly straightforward to continue the pattern. There are a few things to be aware of, however:
- Each Conqueror can only spawn once per “set” or Sirus run.
Make sure to check that you’re running a region where your Conqueror can spawn. For example, if green is the only one left, don’t run a region in which you’ve already collected the green Watchstone. You can check which stones you still need in each region by hovering over that region’s storage space.
- The Conqueror won’t automatically spawn on the first map that you run in a region.
- Once spawned, the Conqueror won’t spawn in the next 2 maps like it did previously
The total number of maps required to initiate the Conqueror boss fight will now be 5, 7, or 9. You can check this on your Atlas:


This process won’t change anymore as you gather the rest of the Watchstones – all the way up to a completed Awakening Level 8 Atlas. Once you have every single Watchstone, you can now socket 4 Watchstones into each region in the entire Atlas. It is only now at this point that we begin to work on completion and gaining the Awakened completion bonuses. We can also combine all of our maps back into our regular map storage tab, as we no longer need to keep track of any specific maps.
Completion and Awakened Bonus Completion
Once we have acquired all 32 Watchstones we should fully socket our Atlas and begin working on completion and Awakened bonus completion. We never want to run a map that doesn’t already have Awakened completion bonus without getting that completion bonus. This means that we will never run a map under tier 14. In particular, we need to pay close attention to make sure that all maps are of the appropriate level for 4 Watchstones as we run them. (There are some JeBaited tier 14 maps that also have tier 16 versions. The tier 14 version will not gain Awakened bonus completion. The quickest way to check this is to throw your map into the map device and check if you get a warning – if you are told that the map is not at the correct level to spawn a Conqueror, then it is actually a 3 Watchstone map of tier 14 and the map is trying to do you a sneaky. Don’t be fooled!)
Note that we do not need to corrupt most high tier red maps in order to gain their completion bonus. Only maps that are naturally tier 11+ require corruption – maps that we have scaled up via Watchstones do not.
You should avoid using the favourite maps systems in any given region until you have completed all the maps within it.
Pull out all of the maps you have that are not yet completed (or, say, five at a time – or whatever you are comfortable rolling). Roll them all, open the Atlas, and right click on each of those maps on the Atlas in turn to check them. This is the only place in the game where the information about whether or not corruption is needed for the completion bonus exists, so we need to check each map in this way.
During this time, completely ignore any spawns of Sirus or the Conquerors. If you the maps you are unlocking and gaining bonus on happen to progress Sirus or a Conqueror incidentally, then it is worth opening their zone and killing them, but don’t go out of your way to do so. I personally won’t run a single map I don’t need to do for completion in this time – even if I would only need one more map to do the Sirus fight. It can wait until after the Atlas has been fully completed.
Throughout this process, you may find yourself getting bored of your league start character and feeling the itch to re-roll and start a new one. It is important to get your Atlas set up and have as much completion as you can do, as early as possible, so I would advise against re-rolling too soon. I would consider the minimum amount of completion and Awakened completion bonus needed before you can comfortably roll a second character and not be at too much of a disadvantage to be around 130 completion bonus with 110 awakened completion bonus.